How To Set Your Walking Poles
For maximum results follow these simple 4 – Step instructions:
Setting your Walking Poles correctly is very important – it helps ensure not only comfort but also increases your ability to carry-out the techniques effectively & in-turn get better results.
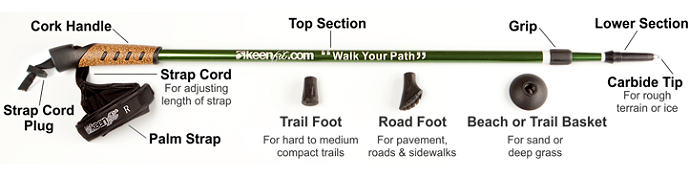
Your Walking Pole Parts
STEP 1: Set & secure the height of your walking poles
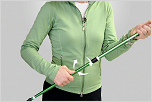
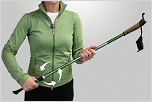 A) Holding a walking pole in your left hand with the handle out to the left, grip the lower section of the pole with your right hand & rotate 1 to 2 turns to the left (towards-you) to loosen. Rule of thumb: Lefty-Loosey – Righty-Tighty.
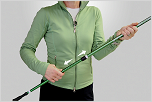 B) Extend Lower section out to the ‘STOP’ Line (not past)
DO NOT TIGHTEN – YET…
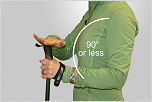 C) Standing up straight place the foot of the walking pole on the ground with your arm relaxed at your side – hold the handle of the pole & gently push the handle down until the inside angle of your elbow is at a tight 90 degree. Better to be a little less then 90 rather than more.
 D) Holding the walking pole in your left hand with the handle out to the left – Grip the lower section of the pole & rotate it to the right (away-from-you) to tighten – till snug.
NOTE: If you have a “3 Section” walking pole – Tighten the lower section at Step B first and then start over again at Step A, B, C & D – using the middle section of the pole.
STEP 2: Set the correct direction of the Road Foot
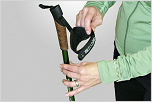
 E) Holding the lower section in one hand, extend the walking pole straight out in front of you with the foot closest to you & the strap hanging down. Looking down the shaft of the pole take hold of the road foot & twist it until the toe of the foot is facing down.

STEP 3: Set and secure the second walking pole
Following steps 1 A & B. Skip step C by pulling the pole out to the same number noted on the pole ruler of the first pole. Then do step D, followed by step 2 to set the correct direction of the road foot.
STEP 4: Adjust and set the palm straps
 F) Holding the lower section in one hand, extend the walking pole straight out in front of you with the foot closest to you & the strap hanging down. Looking down the shaft of the pole take hold of the road foot & twist it until the toe of the foot is facing down.
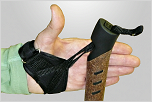
* Rule of Thumb Strap should sit on the heel of your hand, not tight around your wrist – keeping the Strap Cord between your thumb & forefinger.
 G) Fasten Palm Strap first identify the right & left straps.
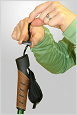
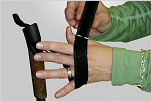 H) As you undo the Velcro, slide your whole-hand in through the strap – placing your palm on the wide part of the strap take hold & grip the cork handle – keeping the Strap Cord between your thumb & forefinger.
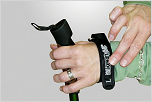 I) Using the opposite hand refasten the strap across the back of your hand, securing the Velcro where comfortable.
* See above Rule of thumb.