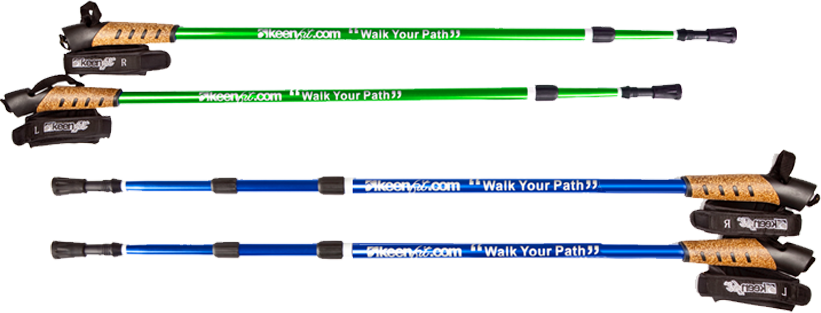
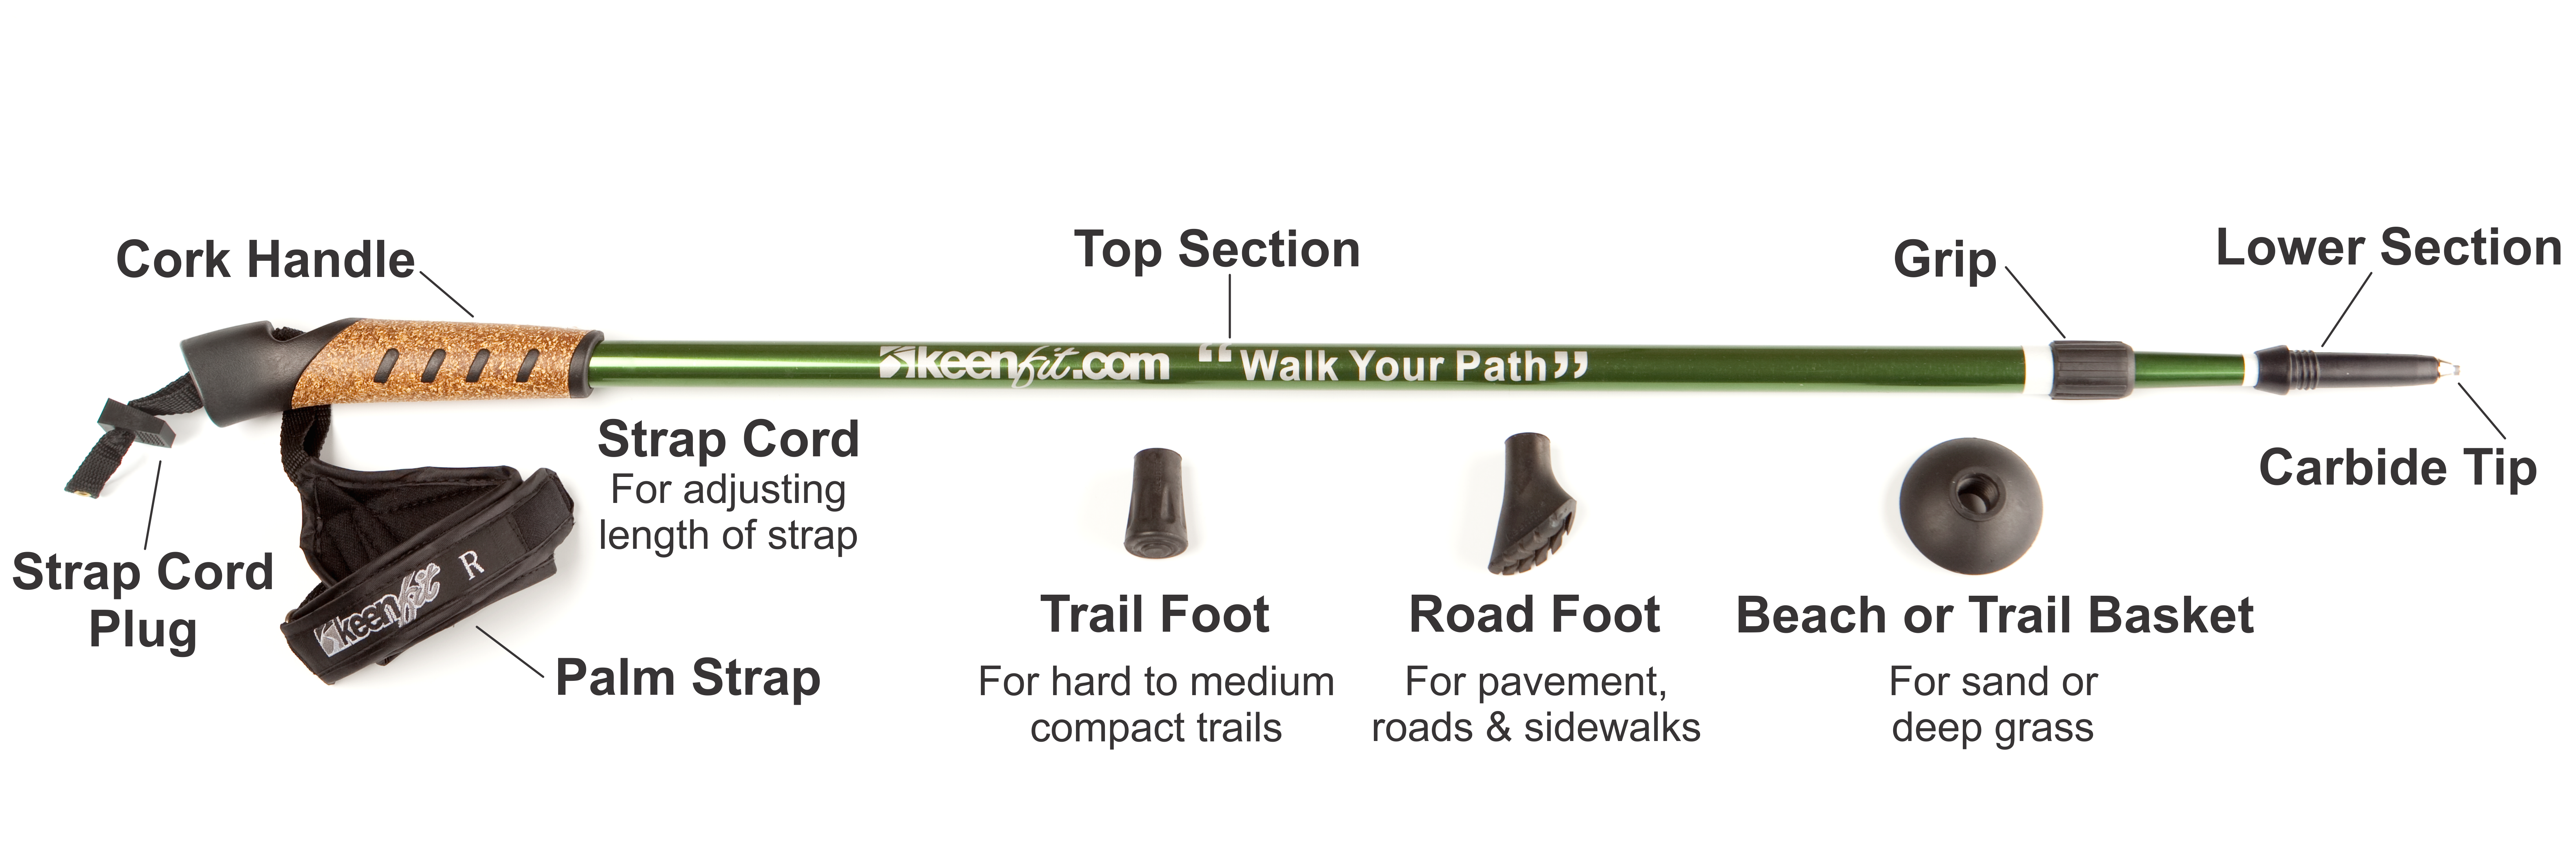
YOUR POLE PARTS:
HOW TO SET YOUR POLES VIDEO:
HOW TO SET YOUR POLES INSTRUCTIONS:
STEP 1 : Set & secure the height of your Poles
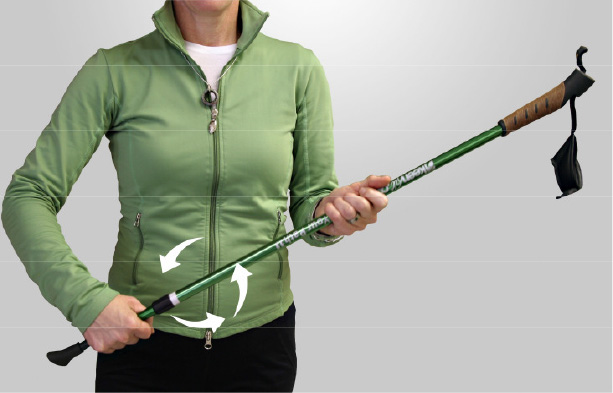
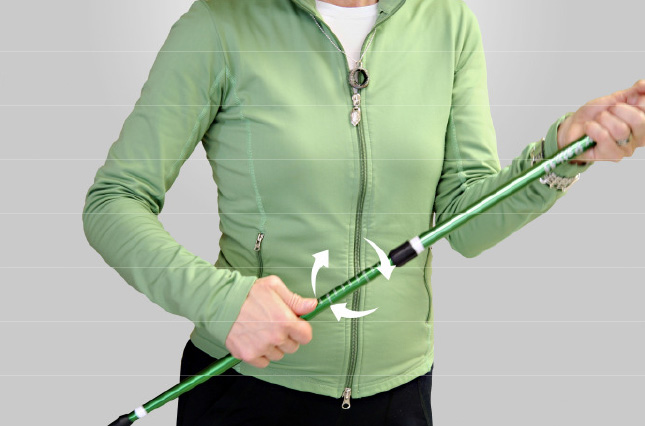
A) Always hold the Pole in your left-hand with the handle out to the left. Grip the Lower-Section of the Pole with your right-hand (your rotating-hand) turning it approximately 1 to 3 turns (towards-you - to the left) to loosen.- Lefty-Loosey - Righty-Tighty
NOTE: Details below for 3-Piece / 3-Section Poles
B) Once loose - gently extend the Lower-Section while keeping both sections in-line with each other. Pulling out & stopping when you reach the ‘STOP-Line' (not past).
NOTE: Do Not Tighten Yet.....
NOTE: Details below for 3-Piece / 3-Section Poles
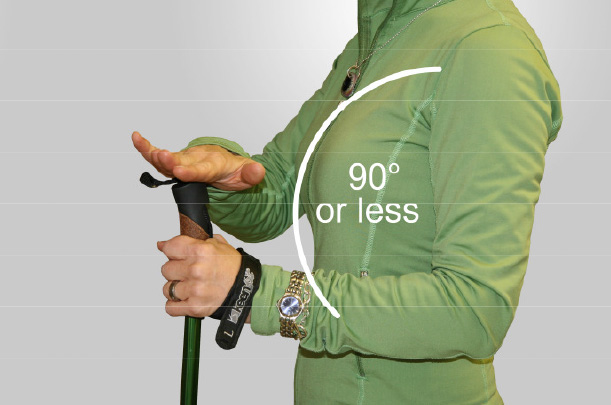
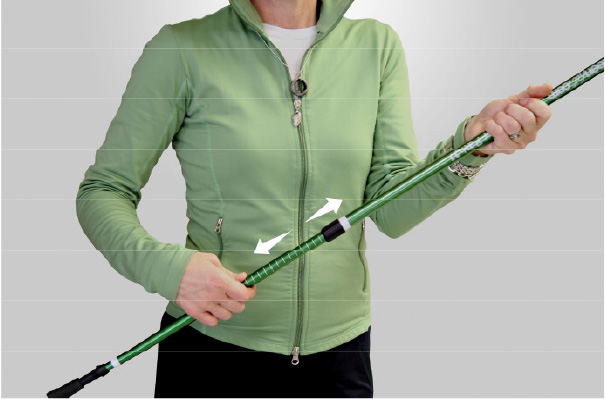
C) Standing sideways in front of a mirror. Stand-up Tall & place the Foot of the Pole gently on the ground. Holding onto the Pole in a relaxed grip midway on the Cork-Handle - with your other hand - gently push the handle down until your forearm is parallel to the ground (& up just a bit). Holding it in that position - take note of the line-measurement indicated on the Lower-Section.
NOTE: It is best that the inside angle of your elbow - be a little less then 90 degree - rather than more.
D) Holding the Pole in your left-hand with the handle out to the left. Lift the Pole up while watching to maintain the line-measurement for your height. To secure & lock into place - grip the Lower-Section of the Pole rotating it to the right (away-from-you) to tighten.
NOTE: To be certain your Poles are locked & secure – rotate until tight & snug.
NOTE: Details for 3-Piece / 3-Section Poles - Start by repeating STEP A & B for the Bottom/Lower-Section - BUT - instead of leaving it loose in order to set your height - jump to STEP D & set, tighten & lock the Lower-Section at the 'STOP-Line' marker and then start over repeating STEP A & B for the Middle-Section of the Pole - following all the way through to the end of STEP 4.
STEP 2 : Set the correct direction of the Road Foot
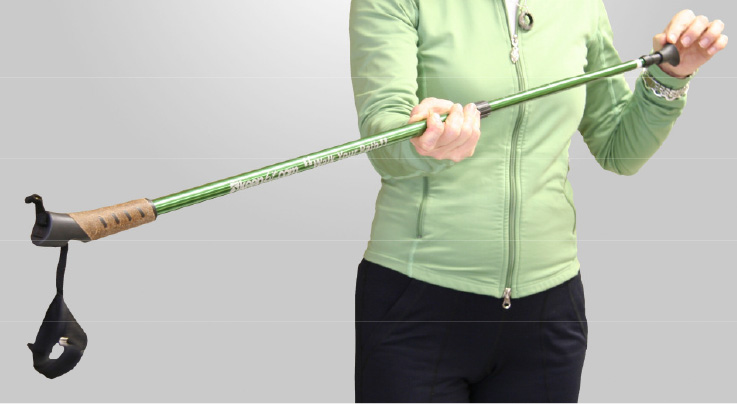
E) Holding the Lower-Section in one hand, extend the Pole out in front of you with the Foot closest to you & the Strap hanging down. Looking down the shaft of the Pole take hold of the Road-Foot & twist it until the toe of the Foot is facing down.
NOTE: Toe-down - Strap-down 
STEP 3 : Set and secure the second Pole
Repeat STEP 1. Follow A & B - Skip STEP C - simply pull the Pole out to the same line-measurement as noted on your other Pole OR hold the two Poles beside each other - after you have lined them up . . . then go to STEP D & continue through to STEP 2 - following along until the end of STEP 4.
STEP 4 : Adjust and set the Palm Straps
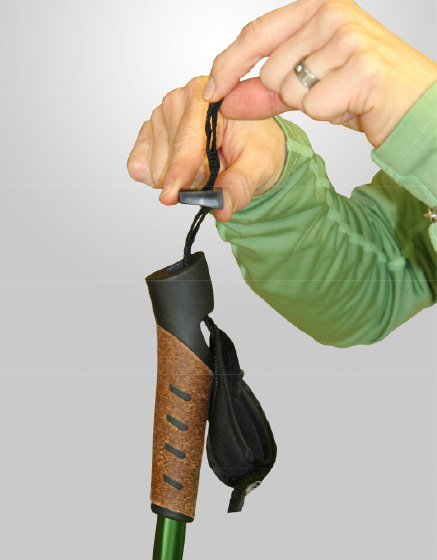
F) To set the length of your Palm-Strap - pull the Cord-Plug up out of the top of the Pole-Handle - releasing the wedge shaped Plug that holds the Strap-Cord & Palm-Strap in place. Pulling the Strap-Cord up or down helps set where your hand will sit on the Cork-Handle. The Palm-Strap is best set about midway on the Cork-Handle. The Palm-Straps are designed for a custom-fit - play around with it until you are comfortable - once the right position is found tilt the Cord-Plug down into the hole at the top of the Pole & pull down on the Palm-Strap.
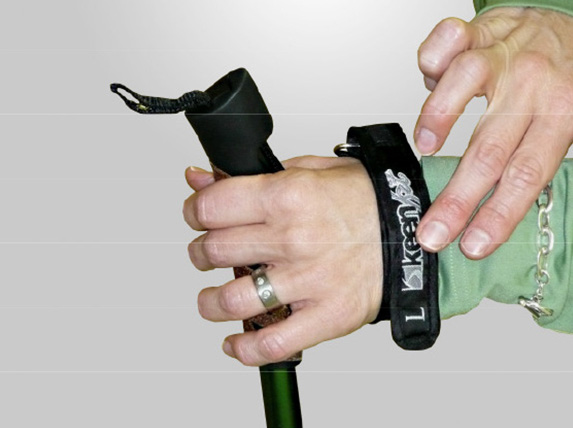
NOTE: The Palm-Strap - is NOT A WRIST-STRAP - The Strap should go across the back of your hand - NOT around your wrist. The triangular part of the Strap sits on the palm/heel of your hand & for even more comfort - be sure to keep the Strap-Cord centered between your thumb & forefinger. 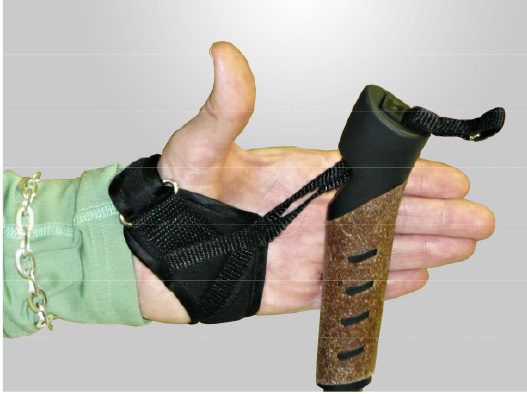
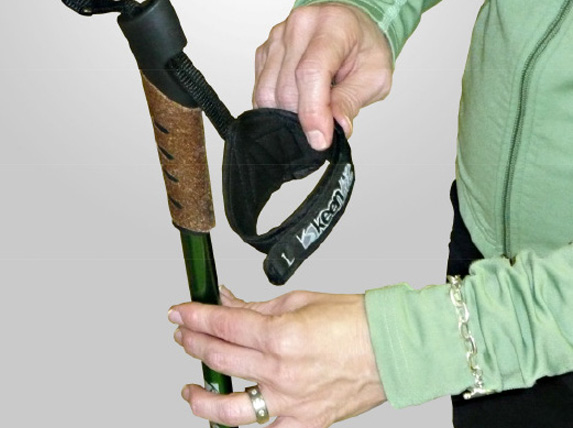
G) Before setting & fastening your Palm-Strap first identify the Right & Left Palm-Straps.
NOTE: 'R' & 'L' is noted on the back of each Strap. It is best to hold the Strap so that the Keenfit Logo is facing you.
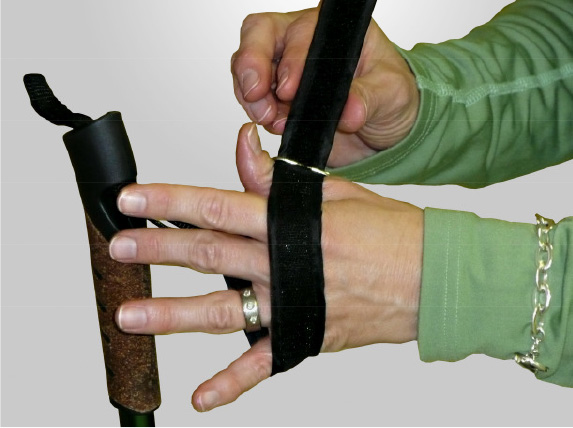
H) Holding the Strap with the Keenfit Logo facing you - undo the Velcro & slide your whole-hand in through the strap - placing your palm on the wide triangular part of the Palm-Strap. Keeping the Strap-Cord between your thumb & forefinger, loosely grip & take hold of the Cork-Handle - with your opposite hand - secure the Velcro across the back of your hand - NOT YOUR WRIST.
I) The Palm-Strap - should go across the back of your hand - NOT around your wrist. The triangular part of the Strap sits on the palm/heel of your hand with the Strap-Cord centered between your thumb & forefinger. The Palm-Straps are designed for a custom-fit - play around with it until you are comfortable.
NOTE: If you can't wiggle-pull your hand out & wiggle-push your hand back in - then your Palm-Straps are too tight...reset them!