3pc-TRAVEL Walking Poles:
123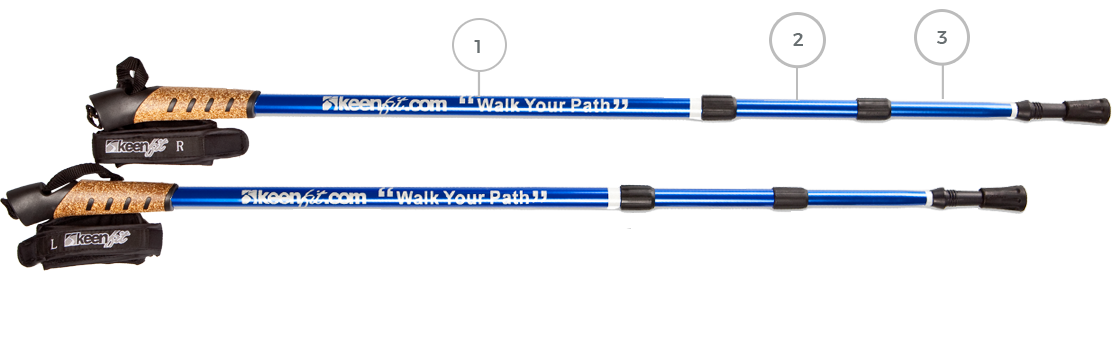

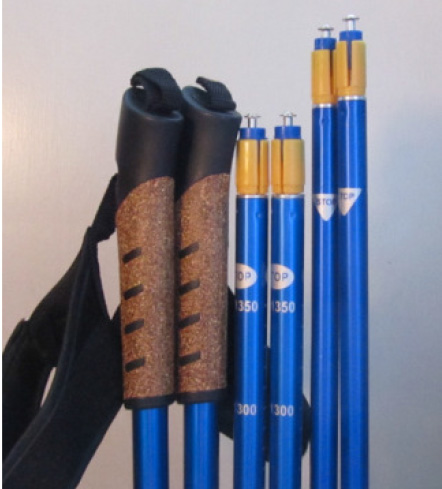
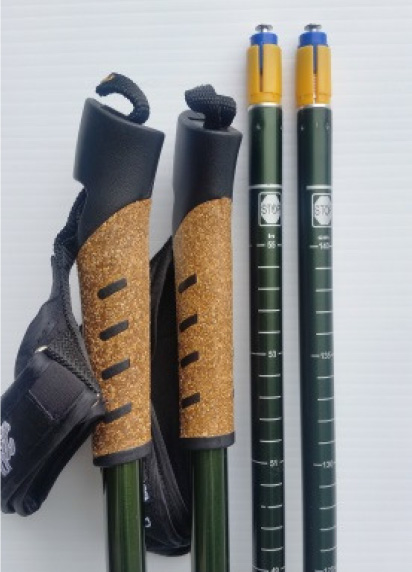
There are four locking mechanisms in a set of Keenfit 3Pc TRAVEL Poles – located at the top-end of both the middle & bottom sections of each Pole. Disassembled - you will have 6 separate peices [shown in the photo to the right].
NOTE : It is very important when un-locking , disassembling, reassembling or locking your Poles that you always hold onto the above/upper section with your left-hand & the bottom-section with your right-hand [shown in the photos below].
1st Disassemble
Remove the bottom-sections from the middle-sections & the middle-sections from the top-sections until you have 6 separate pieces.
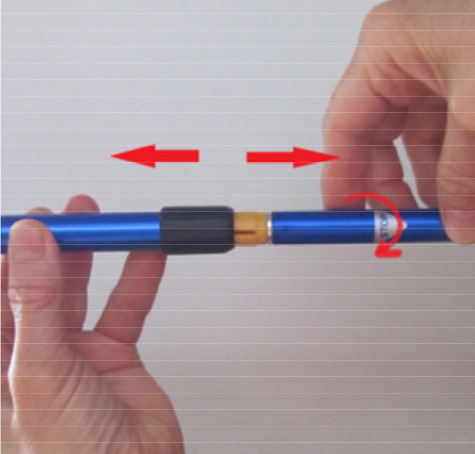
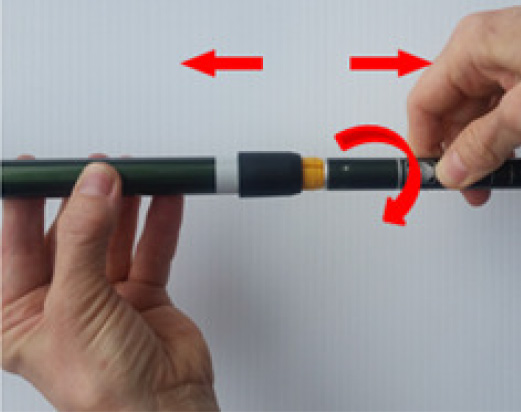
Holding onto the middle-section with your left-hand - rotate the bottom-section - with your right-hand counter-clock-wise - to the left - (lefty-loosy) - until it starts to pull-out freely. Then keeping the Pole sections level with each other & your hands comfortably close together - pull the lower-section out gently - in an aligned motion – pulling past the ‘Stop mark’ until they come apart into separate pieces [See the photo to the left].
Then repeat the above instructions - holding onto the top-section with your left-hand & removing the middle-section.
2nd ReSet & Position the Locking Mechanism
Be sure it is set correctly before reassembly.
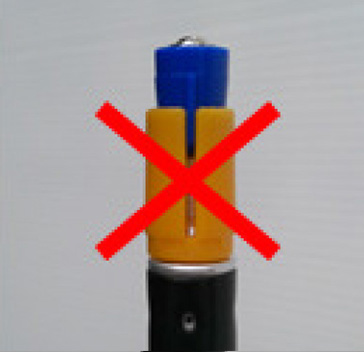
The blue cylinder should NOT be to the top of the center metal bolt-shaft - RESET it lower down.
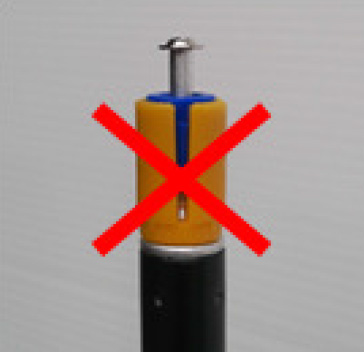
The blue cylinder should NOT be too low on the center metal bolt-shaft - RESET it up higher.
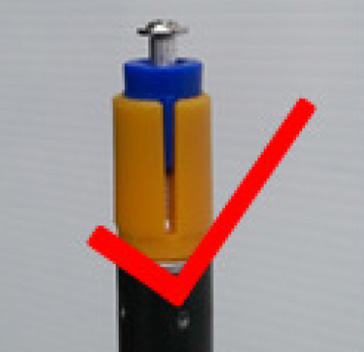
the tio if the blue cylinder SHOULD be halfway between the top yellow expansion piece & the top of the center metal bolt-shaft - RESET it to sit aprox 1/4 inch / 7mm down.
The top of the Blue cylinder SHOULD be halfway between the the top of the yellow expansion piece & the top of the center metal bolt-shaft
– it is important to RESET it to sit aproximately 1⁄4 inch / 7mm down.
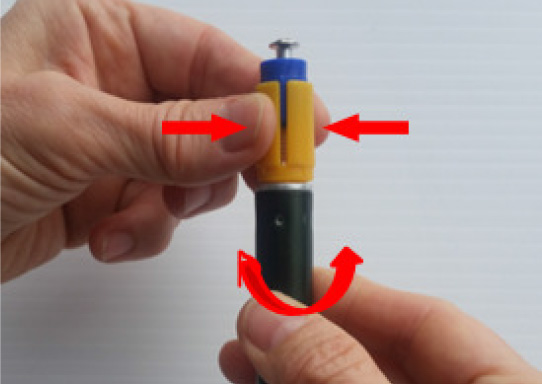
To LOWER the blue cylinder (hold the yellow expansion piece between your thumb & pointer-finger of your left-hand & with your right-hand rotate the Pole below to the right).
To RAISE the blue cylinder (hold the yellow expansion piece between your thumb & pointer-finger of your left-hand & with your right-hand rotate the Pole below to the left).
3rd Reassemble

Telescope all 6 pieces back together - lock & secure – ready to go!
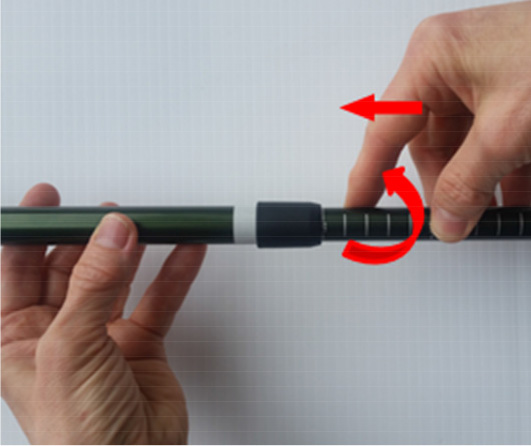
Holding onto the middle-section with your left-hand - insert the bottom-section with your right-hand - keeping the Pole sections level with each other & your hands comfortably close together. Gently push the bottom-section in - in an aligned motion – pushing the bottom-section all the way in until it is fully telescoped inside the middle-section [See the photo to the left].
Then repeat the above instructions - holding onto the top-section with your left-hand & insert the middle-section.
How-to Set your Walking PolesMore info or assistance call us Toll-Free 1-877-533-6348
2pc-FITNESS Walking Poles:
12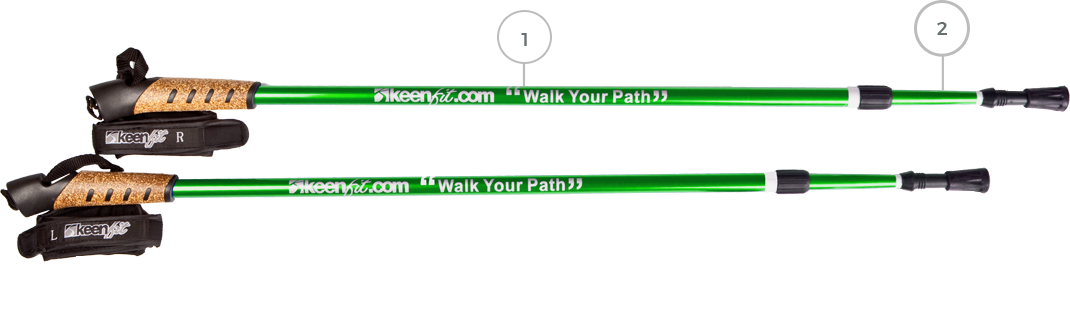
There are two locking-mechanisms in a set of Keenfit 2Pc FITNESS Poles – located at the top-end of the bottom-sections of each Pole Disassembled - you will have 4 separate peices [shown in the photo to the right].
NOTE : It is very important when un-locking , disassembling, reassembling or locking your Poles that you always hold onto the top-section with your left-hand & the bottom-section with your right-hand [shown in the photos below].
1st Disassemble
Remove the bottom-section from the top-section until you have 4 separate pieces.
Holding onto the top-section with your left-hand - rotate the bottom-section - with your right-hand counter-clock-wise - to the left - (lefty-loosy) - until it pulls-out freely. Then keeping the Pole sections level with each & your hands comfortably close together pull the lower section out gently - in an aligned motion – pulling past the ‘Stop mark’ until they come apart into separate pieces [See the photo to the left].
2nd ReSet & Position the Locking Mechanism
Be sure it is set correctly before reassembly.
The blue cylinder should NOT be to the top of the center metal bolt-shaft - RESET it lower down.
The blue cylinder should NOT be too low on the center metal bolt-shaft - RESET it up higher.
the top of the blue cylinder SHOULD be halfway between the top yellow expansion piece & the top of the center metal bolt-shaft - RESET it to sit aprox 1/4 inch / 7mm down.
The top of the Blue cylinder SHOULD be halfway between the the top of the yellow expansion piece & the top of the center metal bolt-shaft
- it is important to RESET it to sit aproximately 1⁄4 inch / 7mm down.
To LOWER the blue cylinder (hold the yellow expansion piece between your thumb & pointer-finger of your left-hand & with your right-hand rotate the Pole below to the right).
To RAISE the blue cylinder (hold the yellow expansion piece between your thumb & pointer-finger of your left-hand & with your right-hand rotate the Pole below to the left).
3rd Reassemble
Telescope all 4 pieces back together - lock & secure – ready to go!
Holding onto the top-section with your left-hand - insert the bottom-section with your right-hand - keeping the Pole sections level with each other & your hands comfortably close together. Gently push the bottom-section in - in an aligned motion – pushing the bottom-section all the way in until it is fully telescoped inside the middle- section [See the photo to the left].
How-to Set your Walking PolesMore info or assistance call us Toll-Free 1-877-533-6348
How to Disassemble & Reassemble your Poles